Stage 5: Mule Agent Fabric Broker for Orchestrating Multi-Agent Systems
Introduction
In this workshop module we explore how multiple agents in an enterprise can be orchestrated using Mule Agent Fabric.
What is Mule Agent Fabric?
MuleSoft Agent Fabric is a central platform for managing AI agents. It brings together agents built on different systems so they can be discovered, secured, and coordinated from one place. This stops "agent sprawl" by giving you a single control point for your entire AI network.
The platform handles four main tasks:
- Discover (MuleSoft Agent Registry): It uses a central registry where you can find and reuse any agent in the company. It enables the registration and versioning of all agentic assets for developers to find and reuse existing capabilities.
- Orchestrate (MuleSoft Agent Broker): It uses an intelligent broker to connect agents and tools to complete complex, multi-step business processes. It evaluates incoming prompts and delegates tasks to the specific agent best suited for the requirement. These processes are defined through easy configurations rather than complex manual coding.
- Govern (MuleSoft Agent Governance): It applies security guardrails and data masking to agent interactions to keep them compliant. This layer enforces security policies such as authentication, rate limiting, and PII detection to ensure that all autonomous workflows remain compliant with enterprise standards.
- Observe (MuleSoft Agent Visualizer): It provides a visual map of how agents make decisions, so you can see exactly what is happening in real-time. It gives visibility into the dependencies and performance of multi-agent workflows to identify bottlenecks or errors in real-time.
In this module we take a closer look at Mule Agent Broker.
Mule Fabric Broker Anatomy: Design & Configure a Multi-Agent System
In this section we examine how to design a multi-agent system orchestration with Mule Fabric Agent Broker.
Explore the Mule Broker Configuration
Configuring & deploying the Mule Broker is very straightforward.
- The Mule Broker itself is a Gen AI agent.
- The instructions (Prompts) to this Broker agent for orchestrating a multi-agent system are provided in the
agent-network.yamlfile. - The property values (e.g., the API key for the Gen AI agent powering Mule Broker) are kept in a file called
exchange.json. - The Mule Fabric Broker configuration and deployment (on CloudHub) is done through Mule Anypoint Code Builder (ACB) tool.
- MuleSoft ACB also provides a generative option for development & configuration of Mule apps using MuleSoft Dev Agent.
Let’s explore a working Broker Configuration.
Let’s open VS Code. The Mule ACB tool is embedded in VS Code.
Let’s type in the command palette: MuleSoft: Create an Agent Network Project

You may be asked to authenticate via embedded browser. Use your Mule trial account to authenticate.


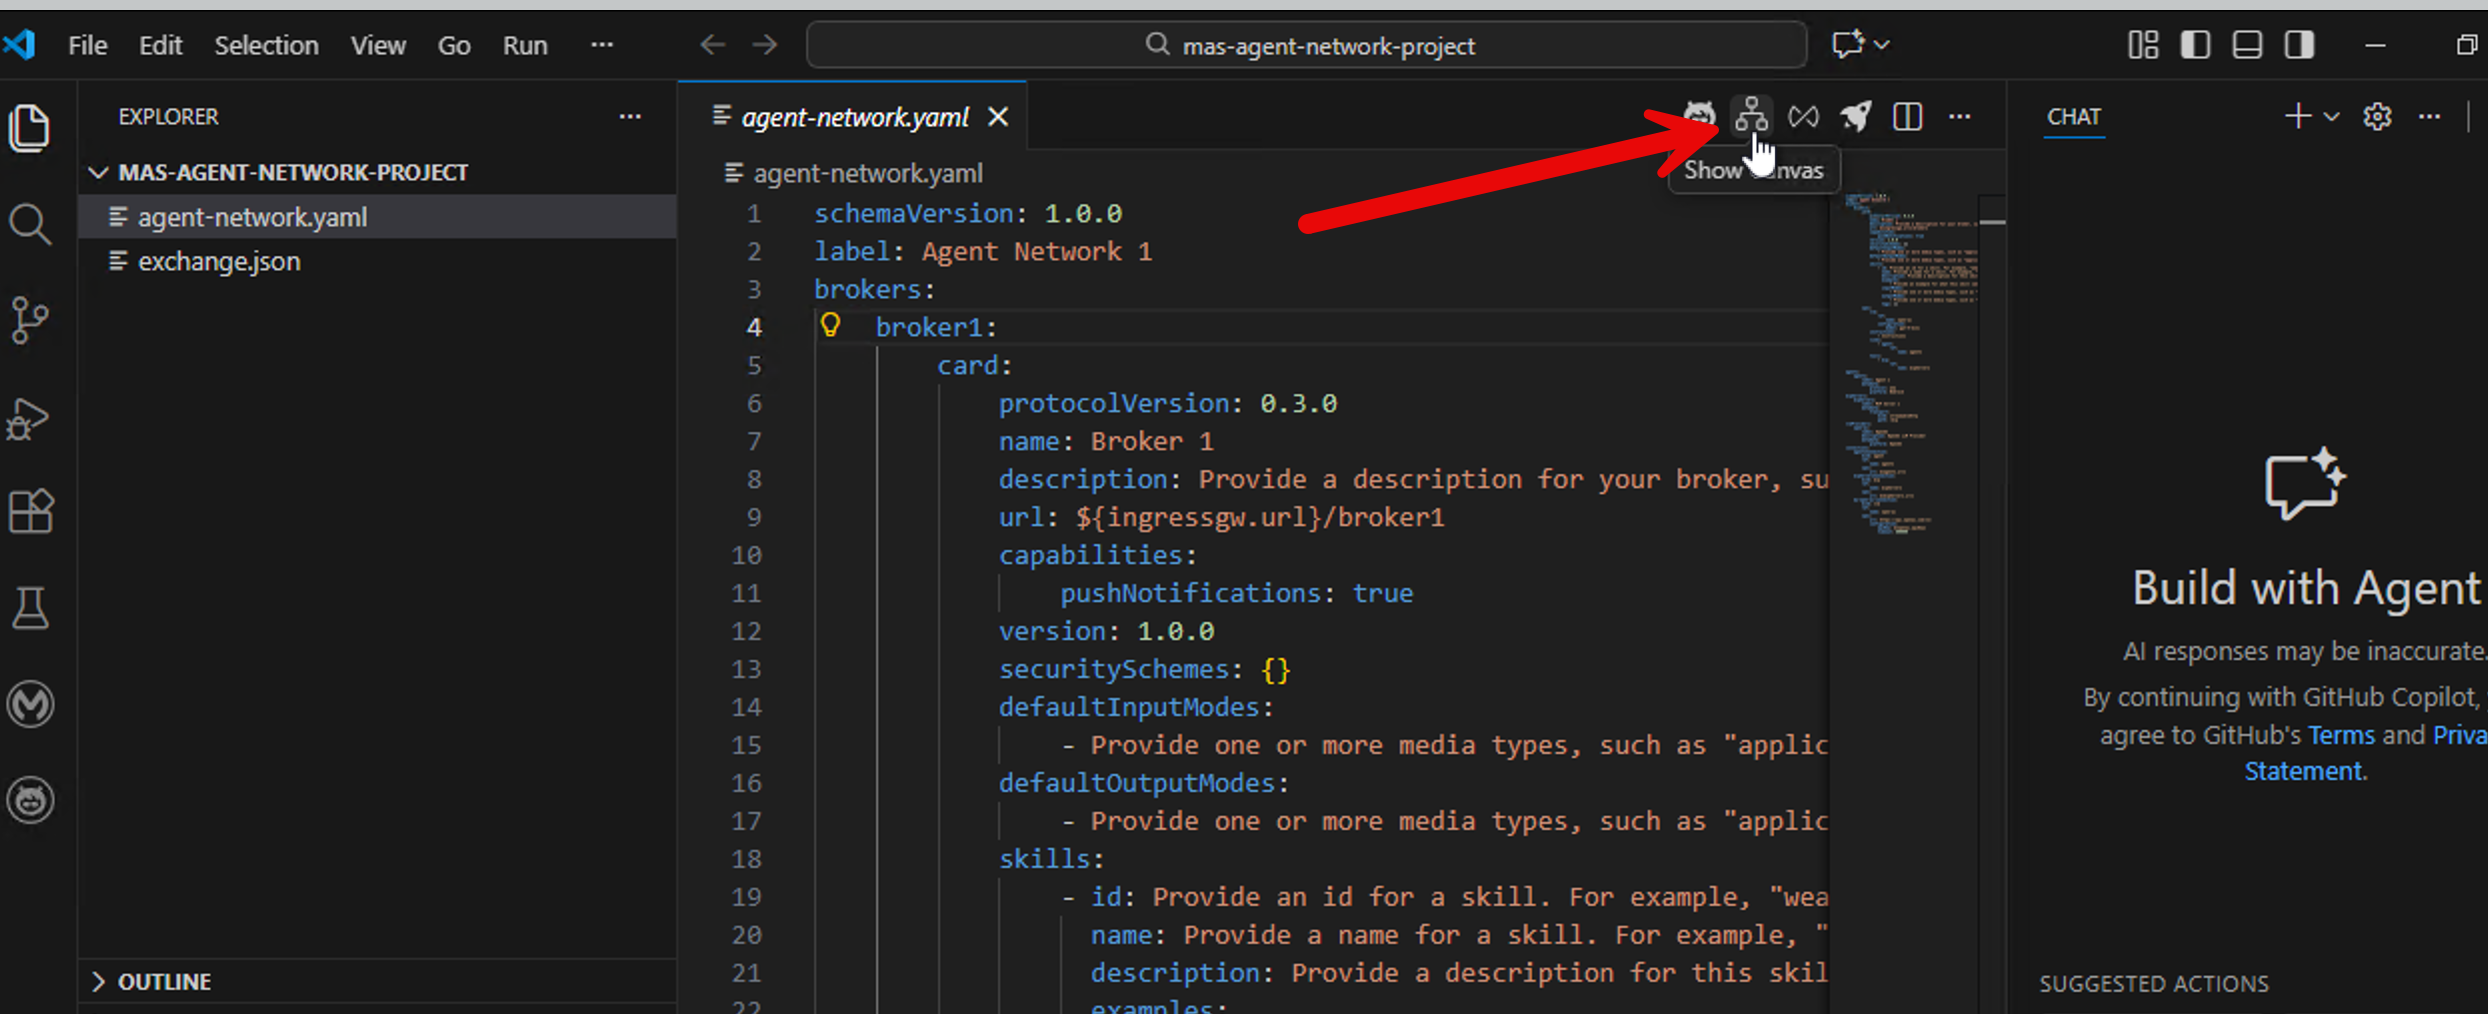
In your project, Mule ACB will create two files.

Click view canvas to view your skeleton file.

Now we will replace this skeleton with a working broker configuration. Replace the contents of the agent-network.yaml file with the file provided to you as follows.
- Delete the contents of the skeleton
agent-network.yamlthat has been automatically generated for you. Don’t delete the file itself. - Download the
agent-network.yamlfile: Download File By default the file gets downloaded toC:\Users\workshop\Downloads
In VS Code open the downloaded file and copy the contents of the file and paste it over the now empty agent-network.yaml file.
Now you can examine this working example of how we provide instructions to the Mule Fabric Orchestrator to manage agents and MCP servers.
Our Use Case: Architecture

Understanding the Broker Configuration: agent-network.yaml
This broker configuration has been created to orchestrate two agents that collaboratively serve a website visitor. When the visitor on the website clicks on the agent, he/she is greeted by the Mule Broker.
- If the user asks a general question, he/she is routed to a Custom Agent powered by Groq LLM.
- If the user asks questions related to service cases, he/she is routed to Salesforce Agentforce Service Agent.
This logic for this orchestration is defined in the agent-network.yaml file.
Think of this file as the DNA of your Broker. It tells the MuleSoft engine three things:
- Who the broker is (Identity).
- How it thinks (Brain/LLM & Instructions).
- What tools it can use (Limbs/Sub-Agents).
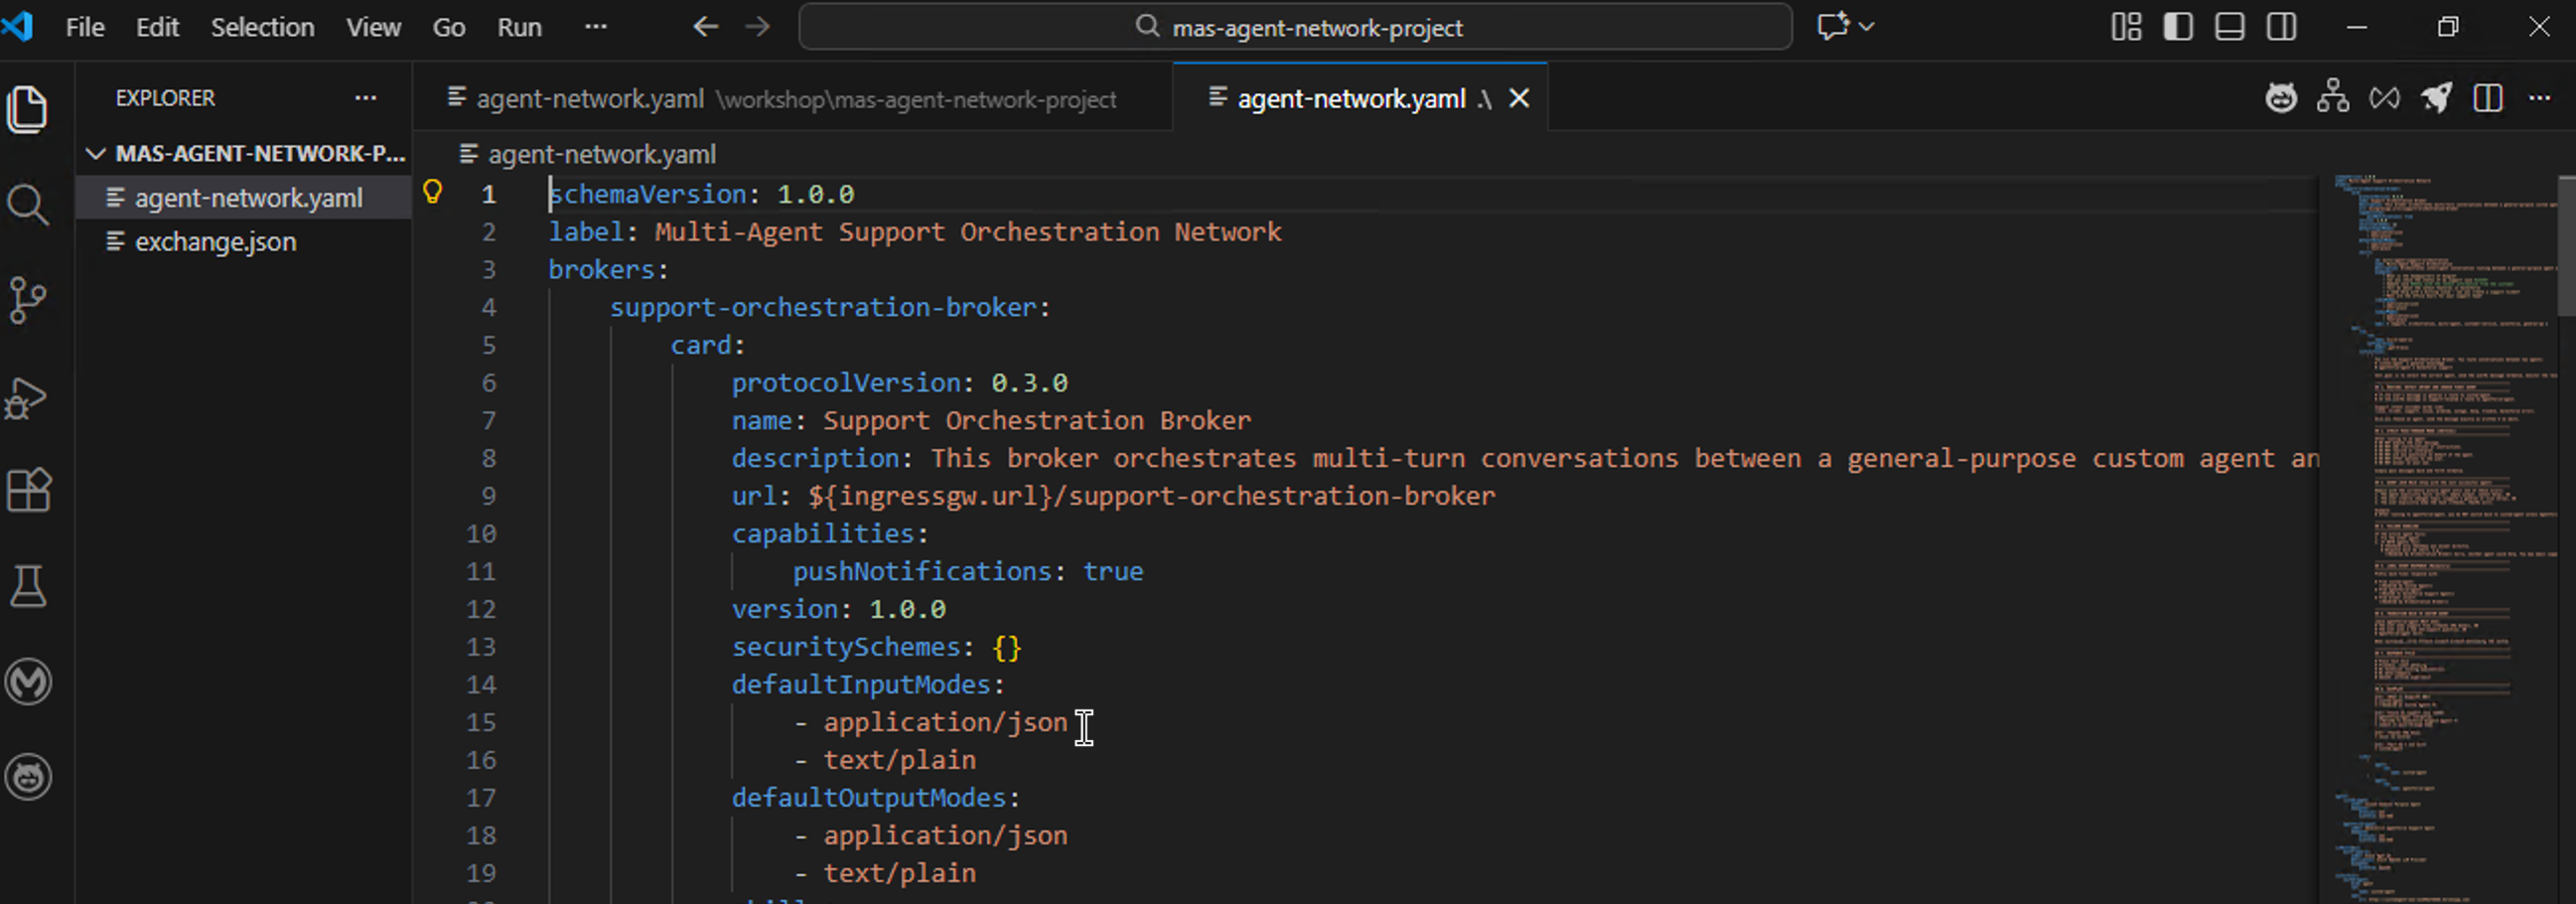
Here is the breakdown of the key sections from your specific Support Orchestration Broker file.
1. The Identity Section (card)
It describes the broker to the outside world so other systems know what it does.
brokers:
  support-orchestration-broker:
    card:
      name: Support Orchestration Broker
      description: This broker orchestrates multi-turn conversations...
      skills:
        - id: multi-agent-support-orchestration
          examples:
            - What is the headquarters of Google?
- Can you check the status of my support case #12345?name&description: These must be clear. In your file, the description explicitly states it routes between a "custom agent" and a "Salesforce agent".skills: This is crucial for discovery. Theexampleslist helps the AI understand intent. If a user asks "Check my support case," the system matches it to this broker because of the examples provided here.
2. The Brain (spec)
This is the most critical part. The spec defines the intelligence.
2A. The LLM Configuration
spec:
  llm:
    ref:
      name: azure-open-ai
    configuration:
      model: gpt-5-mini
What it does: This tells the broker which brain to use. You are using azure-open-ai with the model gpt-5-mini. This model will process every user prompt to decide what to do next.
2B. The System Instructions (instructions)
This is the System Prompt. It is the set of rules the Broker must follow for "Multi-Agent Orchestration"
- Routing Logic: We explicitly tell the brain how to choose a path:
- Strict Pass-Through:
- Why this matters: This prevents the Broker from summarizing or "hallucinating" on top of the sub-agent's answer. It acts as a pure pipe.
- Agent Lock Rule:
- Why this matters: This prevents "context switching" fatigue. If you are fixing a ticket, you don't want the broker to suddenly jump to the General Agent just because you said "Thanks."
- Labeling:
- "Prefix each final response with... (Handled by Custom Agent)"
- Why this matters: This provides transparency to the user so they know who is answering.
C. The Limbs (links)
links:
  - agent:
      ref:
        name: custom-agent
  - agent:
      ref:
        name: agentforce-agent
What it does: These are the only two "tools" the Broker is allowed to touch. If it's not listed here, the Broker cannot access it.
3. The Inventory (agents & llmProviders)
This section registers the components referenced above.
agents:
  custom-agent:
    label: Custom General Purpose Agent
    metadata:
      protocol: a2a
      platform: a2a-SDK
Concept: This defines what "custom-agent" actually is (in this case, an Agent-to-Agent (A2A) compatible service).
4. The Wiring (connections)
This is where the rubber meets the road. It maps the abstract names to actual URLs and Credentials.
connections:
  custom-agent:
    spec:
      url: https://customagent-a2a-ce169bafb6d6.herokuapp.com/

  azure-open-ai-connection:
    spec:
      configuration:
apiKey: ${openai.apiKey}- URLs: You can see the
custom-agentlives on Heroku (herokuapp.com). - Security: Notice
${openai.apiKey}. Never hardcode passwords in YAML. This syntax tells the Broker to look in a secure configuration file (or environment variable) for the actual key. This api key is stored in a separate fileexchange.json
How can we change or add to the Fabric Broker Configuration
Let’s say, that in addition to the two A2A agents, we want to add a MCP server in the broker configuration.
We have two options.
- We can manually edit the
agent-network.yaml. - We can ask the Mule Dev Agent to help in this.
Note: The Mule Dev Agent may not be available to workshop participants as it requires you to authenticate with a Mule Enterprise licensed account. However following is a screenshot of how we interact with the Mule Dev Agent.
MuleSoft Dev Agent
Mule Dev Agent is available within Mule Anypoint Code Builder (ACB). Mule ACB lives within VS Code as a set of extensions.
Following is a quick example of how MuleSoft facilitates generative development (in addition to point and click and programmatic options)

MuleSoft Dev Agent is a LLM powered Gen AI agent. It can understand your question and optionally update the files in your folder. As an example in our configuration if we would like to include a MCP server, we could ask the Mule Dev Agent.

Summary
Mule Agent Fabric Broker is a centralized orchestration framework that intelligently routes user requests to specialized "Limbs" (sub-agents) like Salesforce or Custom Agents instead of processing everything itself.
Defined declaratively in an agent-network.yaml file, the Broker uses an LLM (such as Azure OpenAI) combined with strict system instructions (e.g., "Routing," "Pass-Through," and "Agent Lock" protocols) to detect intent and delegate tasks without hallucinating or losing context.
To implement this, developers use Anypoint Code Builder (ACB) to follow a standardized lifecycle: establishing a secure Ingress Gateway, creating the Agent Network Project to define tools and logic, publishing the asset to Anypoint Exchange, and finally deploying & monitoring the active Broker to a cloud runtime for governed external access.
Appendix
Sequence of Tasks for Configuring & Deploying a Mule Agent Fabric Broker
Perform these steps in exactly this order to configure and deploy a Fabric Agent Broker using Mule Anypoint Code Builder.
Step 1: Setup Infrastructure
Prepare the secure gateway in your private cloud space.
Command: CMD + SHIFT + P
Select: MuleSoft: Set Up Agent Network Gateways
Step 2: Create Project
Initialize the local project structure.
Command: CMD + SHIFT + P
Select: MuleSoft: Create an Agent Network Project
Step 3: Publish Assets
Upload the Broker definition to Anypoint Exchange.
Command: CMD + SHIFT + P
Select: MuleSoft: Publish Agent Network Assets
Step 4: Deploy & Connect
Push the Broker to the runtime environment.
Command: CMD + SHIFT + P
Select: MuleSoft: Deploy Agent Network
Final Action: Once deployed, copy the public endpoint (the URL ending in your project name) to begin using your agent.
When you run MuleSoft: Deploy Agent Network, you are taking the Agent Network Project (the agent-network.yaml definition file where you listed your tools and LLM) and deploying it as a running Mule Application.
This application acts as the Broker. It sits online, receives user prompts, and uses the logic defined in your "Agent Network" to decide which tools to call.
Intro to the Mule Anypoint Code Builder
The Mule Agent Fabric Broker configuration is done in the Mule Anypoint Code Builder tool.
Mule Anypoint Code Builder (ACB) is based on VS Code. You execute tasks using the Command Palette:
- Shortcut: Press
CMD+SHIFT+P(Mac) orCTRL+SHIFT+P(Windows). - Action: Type
MuleSoftinto the search bar to filter for Fabric commands, then select the specific command you need.